Veering away from the type of content that I’ve been writing so far I thought I would cover a technical tutorial on how to use custom icons in the skills section of the Academic theme in Hugo. But, don’t worry I will finally get back to the promised New Zealand content in one way or another soon!
What was I trying to solve?
The Academic theme for Hugo has a pretty neat “Skills” section, used to highlight a person’s skills with pretty icons associated with each skill. By default Academic comes with a decent selection of icons from the free packs of Academicons and Font Awesome but, crucially, neither of these packs has an icon for one of my favourite tools; Terraform! I wasn’t having any of that so I decided I needed to add some custom icons.
How I added custom icons to Academic
First things first, Academicons and Font Awesome provide something called Web Fonts. This is a CSS feature which allows you to specify font files to be downloaded alongside your website when it is accessed. Inside these font files are, well, fonts. Fonts are just a collection of images that you associate with a set of characters or code numbers, some are known by default, such as letters and keyboard symbols, and others can be added after the fact. This feature of CSS, as well as the web app from Icomoon, gave me everything I needed.
Create a Web Font using Icomoon icons
Here are the initial steps for creating a Web Font from the icons that Icomoon provides.
- Visit https://icomoon.io/app/#/select
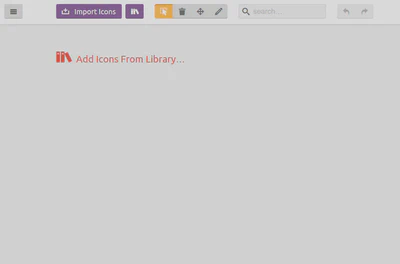
- Click “Add Icons From a Library…”
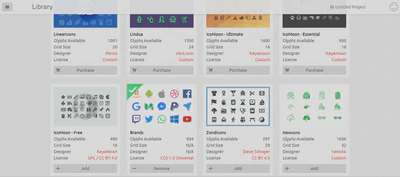
- Select a library to choose icons from, I chose the “Brands” library
- Select the icons you would like to use on your website
- Generate the font and download the
.ziparchive from Icomoon
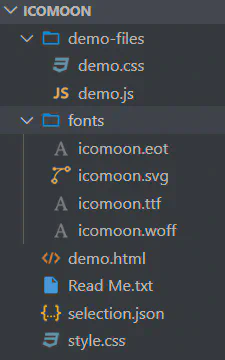
- Unzip the archive and you’ll get a folder structure like so:
Adding your custom icons to your Web Font
On the face of it adding your icons to your Icomoon Web Font looks easy, just click import icons at the top of the page and choose your icons but it’s not quite so simple. Icomoon only accepts “proper” SVG files and because of the way they implement the icons the images can only have one colour.
So it turns out, not all SVG files are created equal, some are just PNG data stuffed into an SVG format. To make sure you have a good SVG you could draw all of your Icons using a drawing app like Inkscape, but ain’t nobody got time for that, so you need to work out if your SVG files are compatible. The easiest way to do this is to just try adding them in and if it fails they aren’t valid. Alternatively, you could take a look at the text inside the SVG files using a text editor; I’ve provided an example of a “proper” and “improper” SVG files contents below:
Improper - Note the image/png inside the text
<?xml version="1.0" encoding="UTF-8" standalone="no"?>
<!DOCTYPE svg PUBLIC "-//W3C//DTD SVG 1.1//EN" "http://www.w3.org/Graphics/SVG/1.1/DTD/svg11.dtd">
<svg version="1.1" id="Layer_1" xmlns="http://www.w3.org/2000/svg" xmlns:xlink="http://www.w3.org/1999/xlink" x="0px" y="0px" width="2500px" height="2463px" viewBox="0 0 2500 2463" enable-background="new 0 0 2500 2463" xml:space="preserve">  <image id="image0" width="2500" height="2463" x="0" y="0"
    xlink:href="data:image/png;base64,iVBORw0KGgoAAAANSUhEUgAACcQAAAmfCAMAAAB/5P07AAAABGdBTUEAALGPC/xhBQAAACBjSFJN
AAB6JgAAgIQAAPoAAACA6AAAdTAAAOpgAAA6mAAAF3CculE8AAAAVFBMVEUAAAD/rhr/rhr/rhr/
...
Proper - Note the references to different types of shape manipulation
<?xml version="1.0" standalone="no"?>
<!DOCTYPE svg PUBLIC "-//W3C//DTD SVG 20010904//EN"
 "http://www.w3.org/TR/2001/REC-SVG-20010904/DTD/svg10.dtd">
<svg version="1.0" xmlns="http://www.w3.org/2000/svg"
 width="378.000000pt" height="134.000000pt" viewBox="0 0 378.000000 134.000000"
 preserveAspectRatio="xMidYMid meet">

<g transform="translate(0.000000,134.000000) scale(0.100000,-0.100000)"
fill="#000000" stroke="none">
<path d="M3460 745 l0 -65 -35 0 -35 0 0 -50 0 -50 35 0 35 0 0 -138 c0 -114
3 -143 18 -171 25 -46 74 -71 139 -71 79 0 83 4 83 69 l0 57 -42 -4 c-61 -6
-68 9 -68 145 l0 113 55 0 55 0 0 49 0 50 -52 3 -53 3 -3 63 -3 62 -64 0 -65
0 0 -65z"/>
I had the best luck with SVG files by searching for the relevant brand’s media pack, sometimes having to convert from the .ai format (another vector image format), but your mileage may vary.
Add your Web Font to your Hugo website
Once you have your Web Font downloaded you’ll need to do a little work to add it into your Hugo site:
- Copy the
fontsfolder over to thestaticfolder in your Hugo Academic site’s codebase - Add a
cssfolder within theassetsfolder - Copy the
style.cssfile into thecssfolder you just created and rename the filecustom.css- You should end up with a folder structure similar to the one below:
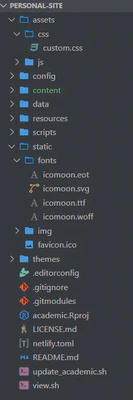
- You should end up with a folder structure similar to the one below:
- Edit the newly created
custom.cssfile to point at the fonts folder via the parent folder, i.e.
@font-face {
  font-family: 'icomoon';
  src:  url('../fonts/icomoon.eot?mwe8bn');
  src:  url('../fonts/icomoon.eot?mwe8bn#iefix') format('embedded-opentype'),
    url('../fonts/icomoon.ttf?mwe8bn') format('truetype'),
    url('../fonts/icomoon.woff?mwe8bn') format('woff'),
    url('../fonts/icomoon.svg?mwe8bn#icomoon') format('svg');
  font-weight: normal;
  font-style: normal;
  font-display: block;
}
- Within your sites code base edit the
config\params.tomlfile to have theplugins_css = ["custom"]
Using your icons in the Skills section of the Academic theme
With all of the files in place now it’s just about using those icons to show off your skills. Simply add some markdown, similar to what’s shown down below, into your content\home\skills.md and you’ll be impressing all prospective employers.
[[feature]]
  icon = "terraform"
  icon_pack = "icon"
  name = "Terraform"
  description = "40%"
The Final Result
If I do say so myself, the outcome was worth the effort 😁